If you are in a language studies course, you may be required to use the Phonetics Module on your Moodle exams. This tutorial will guide you on how to turn it on using your Moodle profile.
STEP ONE:
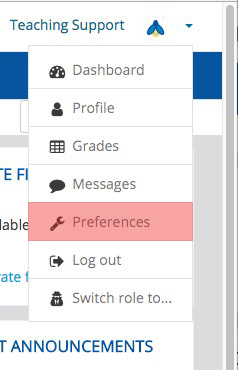
When logged into Moodle, click on your user settings on the top right corner. Under the dropdown list, choose Preferences.

STEP TWO:
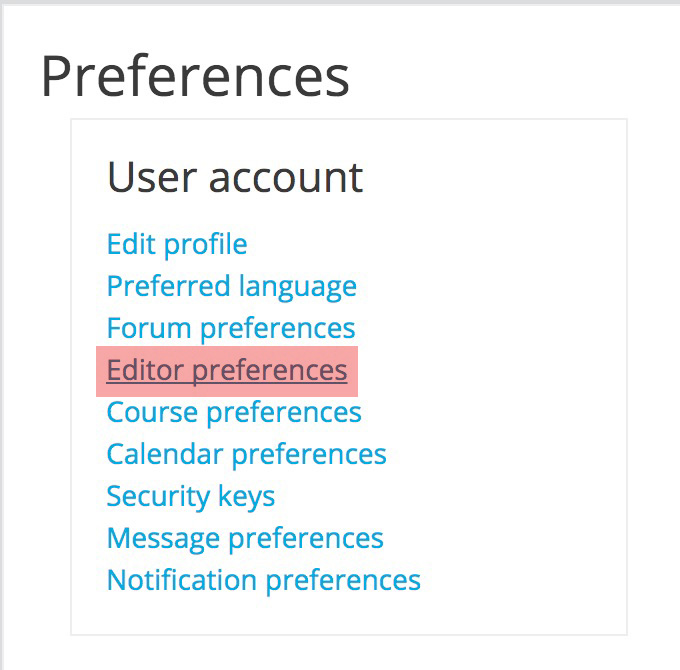
Click on Editor Preferences.

STEP THREE:
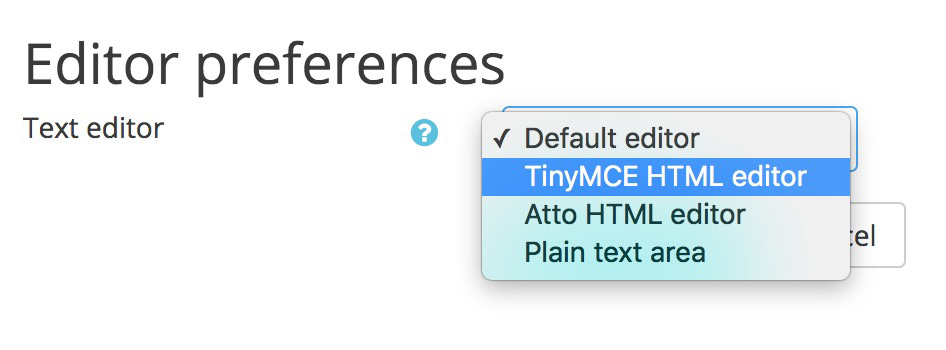
Click on the drop-down list. Choose TinyMCE HTML editor.

STEP FOUR:
Click Save Changes.
![]()
The Phonetics editor will now be available during the exam.
NOTE: The Phonetics editor displays differently. The options available are longer than the window that opens. Students will need to drag the Phonetics editor window wider to see all of the character options that they may insert.
