Moodle allows you to create custom resources and content in many areas. Two such areas are labels and pages. This tutorial will walk you through how to build a custom page within Moodle, how to add and resize images, and how to add a YouTube video. At the end of this tutorial, you will know how to manipulate different types of content utilizing the WYSIWYG (What You See Is What You Get) editor.
Adding a page:
1. Make sure editing is turned on at the top right of your Moodle page.

2. Choose Add an Activity or Resource in the section you wish to work with. Under Resources, choose Page.


3. Add a Name for your your page.

4. Add your content.
Enter content into the paragraph body labeled Page Content. It is important to note that the following instructions relate to the WYSIWIG editor, and the functionality of this editor is available wherever it appears. Note that even the description field has a WYSIWIG editor, and topic summaries can be created using the WYSIWIG Editor. To see all available options in the editor, click on the ‘expand arrow’ icon in the top left.
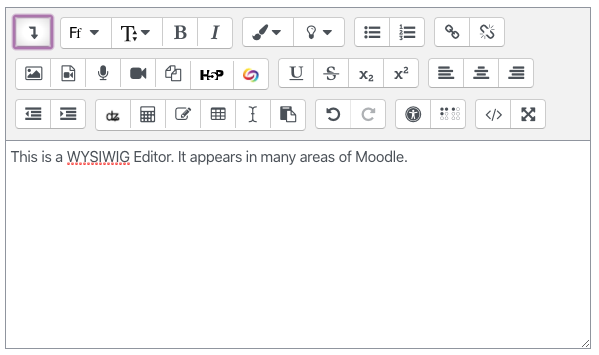
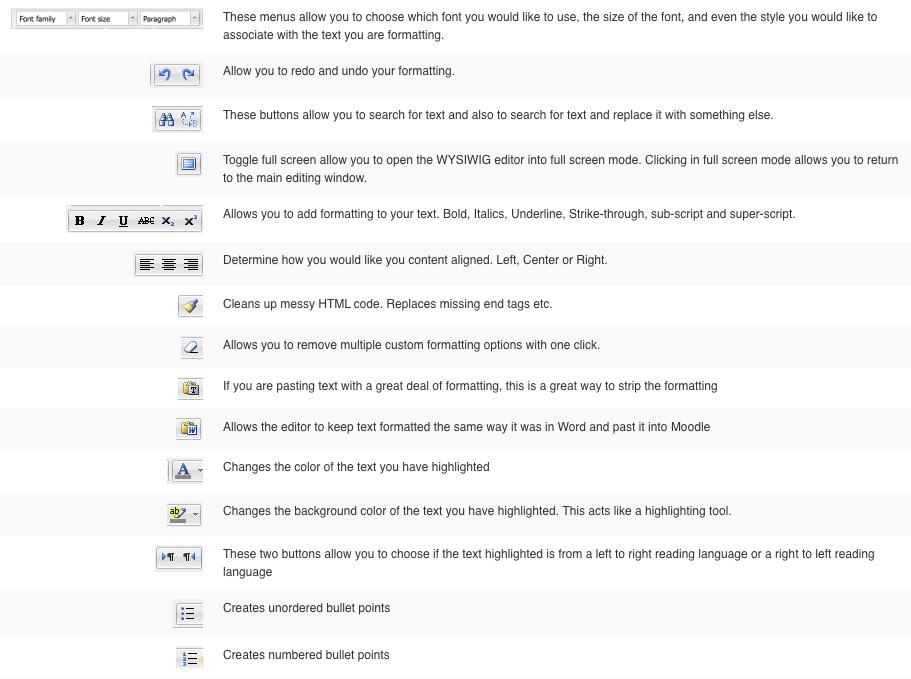
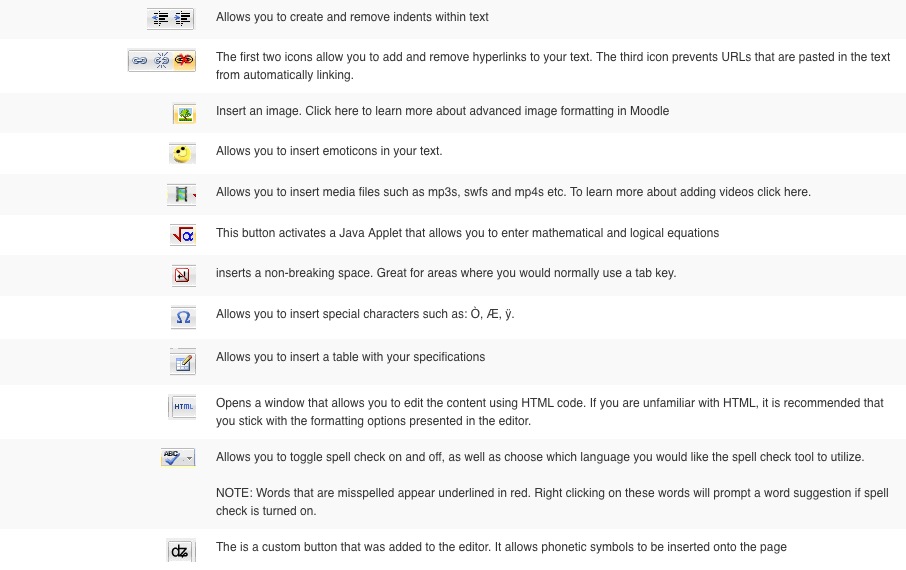
WYSIWIG editor functions
Adding images, hyperlinks, and a YouTube video:
In the Content section, click the Add Image button.

Then click on the Browse Repositories button.
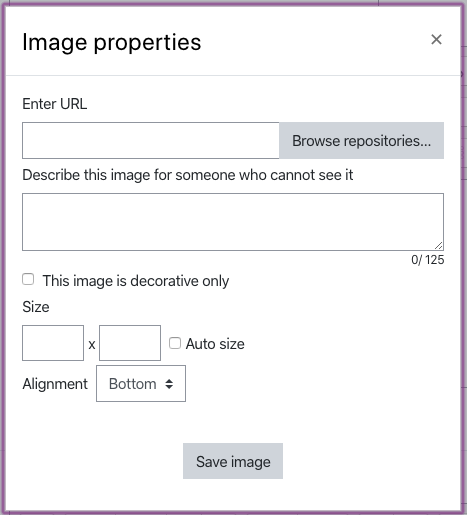
The window that appears prompts you to upload a file. Click on Choose File to find and upload an image. The file picker will ask you where you would like to browse for files. In the following example, we will upload a file from our computer.
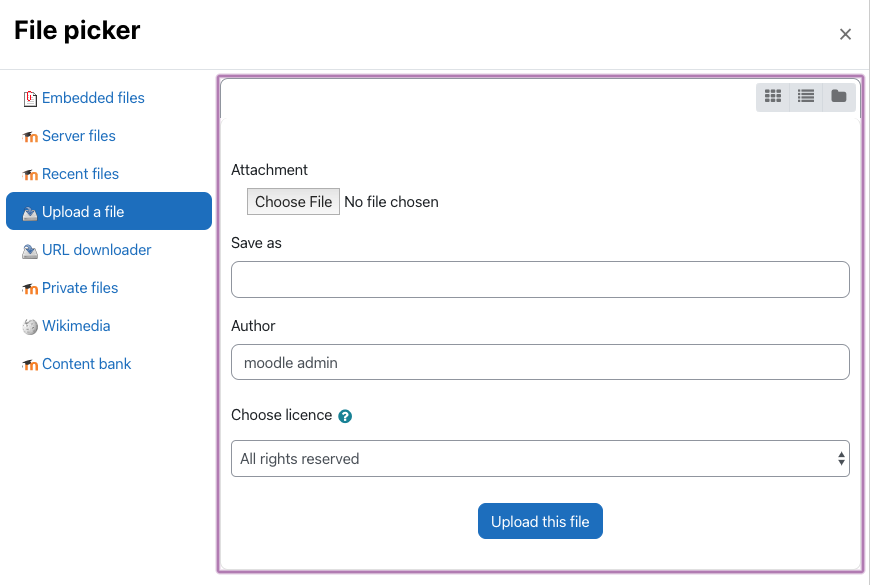
NOTE: Make sure to use the correct file extension in the name. ( .jpg .png .gif )
Don’t forget to upload your file after you have browsed for it by clicking on Upload this File at the bottom.
If you find that your image is too large, you can edit the size of the image by adjusting the size dimensions. The image preview window is a dynamic window, and as you edit attributes of the image, the preview window will dynamically change.
In the dimensions area, you are able to scale the image. Make sure Auto Size is checked. Having this feature checked will allow you to scale your image without stretching or compressing it.
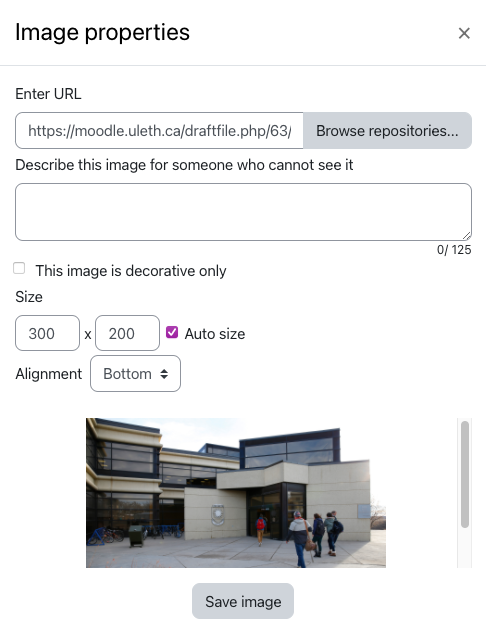
NOTE: If your uploaded image is too small and you try to scale from this window, the image will pixilate.
Next let’s add a YouTube video to the page.
Find the video you wish to display on youtube.com
On YouTube, choose the option to share the video. Additional options will appear. Choose your desired settings.
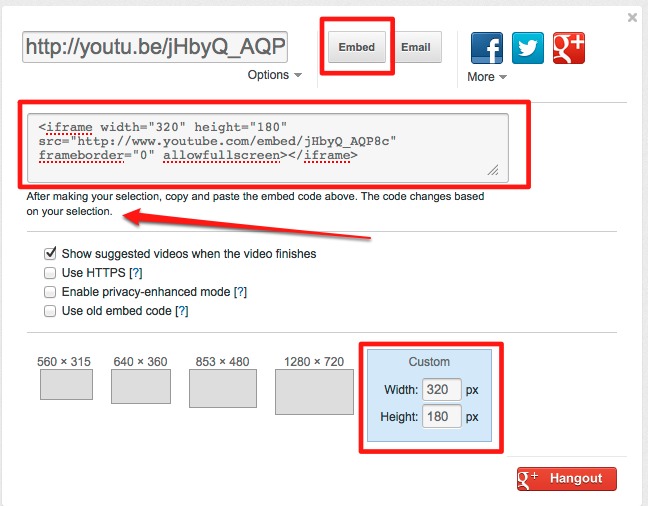
Near the bottom are sizing options. By default, YouTube may have the smallest size set to 560×515. This will need to be changed in order to display properly in Moodle. Your video must be under 400 pixels in width. To change this, you should type in a custom width. 320 pixels is a good width. When you type in 320px in the width field, YouTube keeps the proportions of the video and completes the height for you.
Once you have changed the width, copy the embed code above.
Return to the page you are creating in Moodle. Click on the HMTL button in the WYSIWYG editor. Paste this code in the html window, not in the regular content window, otherwise you will create a page with only code showing.
Once you paste the embed code in the proper place, click on update. This will update the HTML for the content window.
Once you have your page content created as desired, save your changes by clicking on Save and Return to Course at the bottom.
![]()
Your page should now be displayed within the topic structure of Moodle. Your students will simply click on the page to access the content.
