Rather than scheduling Zoom meetings in an external portal and copy-pasting links into Moodle, instructors should use Moodle’s integrated Zoom tool. By creating a unified Zoom dashboard, you can schedule and manage sessions directly within Moodle. Scheduled meetings automatically populate the Moodle Calendar and are instantly visible to all enrolled students.
Step-by-Step Instructions
1. Log into Moodle (moodle.uleth.ca) and navigate to your course page.
2. In the top-right corner, click to toggle Edit mode into the active position.
3. Scroll to the top topic section of your course and click Add an activity or resource.
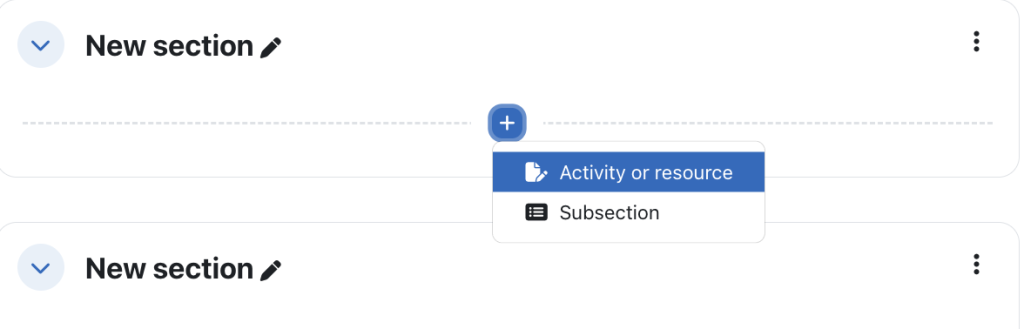
4. In the Moodle Activity Chooser, select Zoom meeting(indicated by the Zoom icon).

5. Configure the general Moodle settings:
- Activity name: Type a clear, general name for the tool (e.g., Class Name – Section – Online Lectures). This represents the overarching dashboard, not a single meeting. Any future meetings you wish to schedule, whether recurring or a one time meeting can be done via this activity link in the future.
- Preconfigured tool: Ensure this dropdown is set to Zoom.
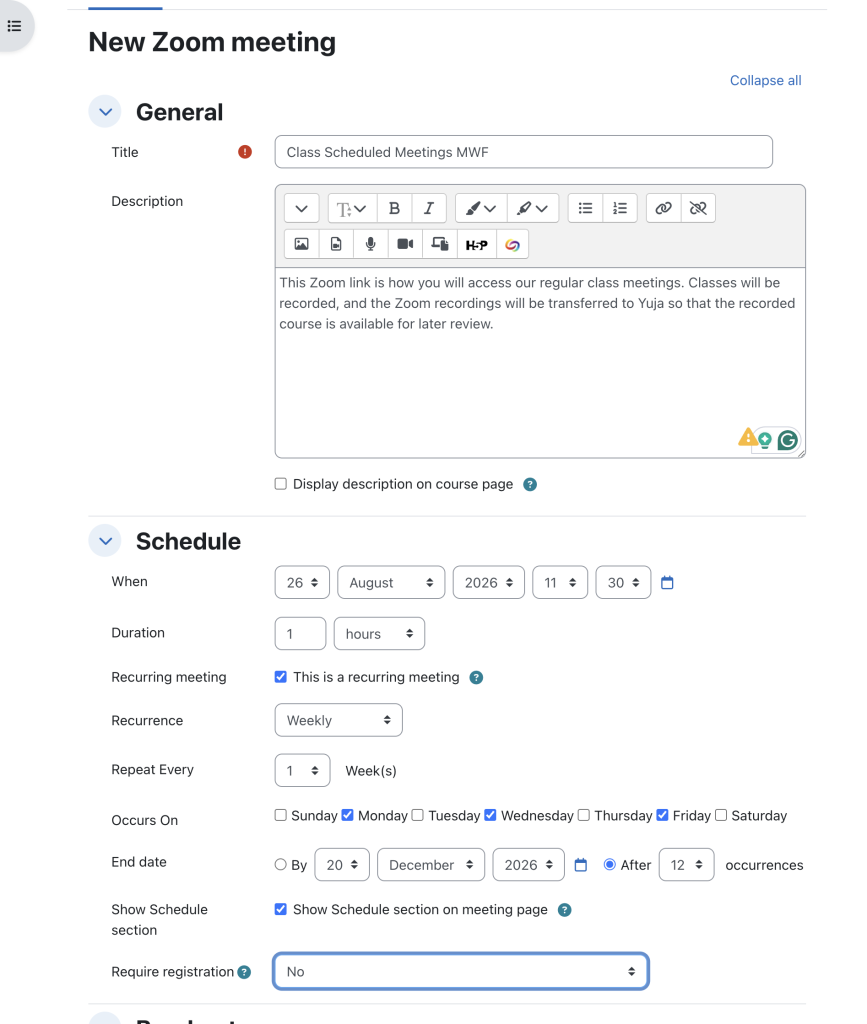
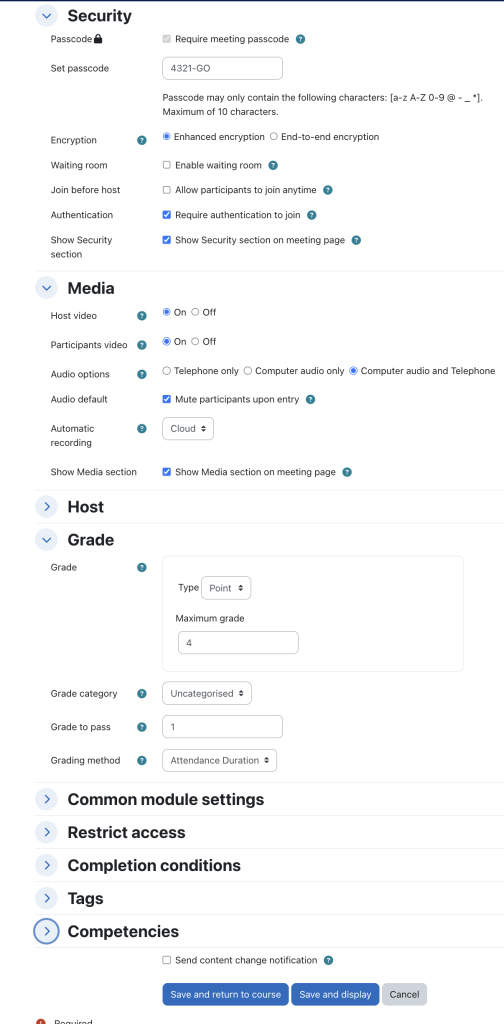
6. Scroll to the bottom of the page and click Save and return to course.
7. On your course page, click on the newly created Zoom Online Lectures activity link to launch the embedded Zoom dashboard.
8. Wait a brief moment for the interface to load, then click the blue Schedule a New Meeting button in the top-right corner.
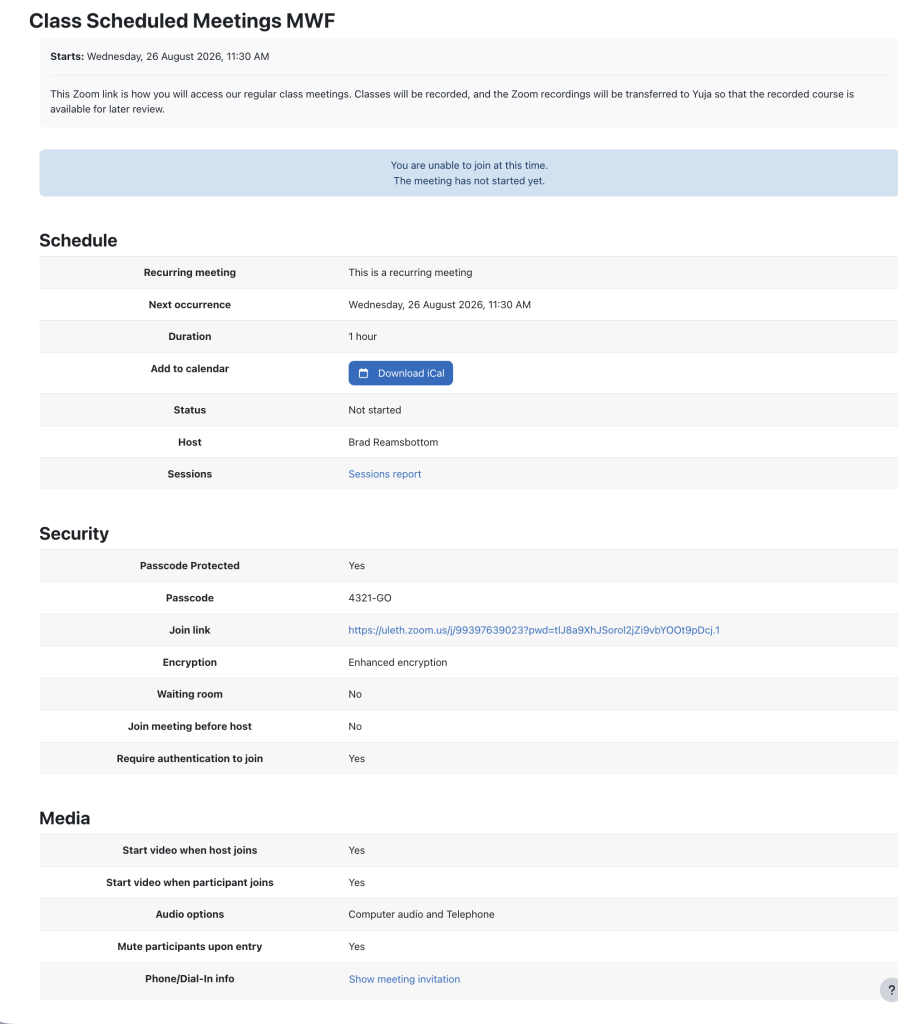
9. Click Save.
Enrolled students will now see this session under their Upcoming Meetings tab when they click the Moodle Zoom link, and it will automatically populate their Moodle Calendar!