Zoom

Adding Zoom Meetings in Moodle 

Rather than scheduling Zoom meetings in an external portal and copy-pasting links into Moodle, instructors should use Moodle’s integrated Zoom tool. By creating a unified Zoom dashboard, you can schedule and manage sessions directly within Moodle. Scheduled meetings automatically populate the Moodle Calendar and are instantly visible to all enrolled students.

Step-by-Step Instructions

1. Log into Moodle (moodle.uleth.ca) and navigate to your course page.

2. In the top-right corner, click to toggle Edit mode into the active position.

3. Scroll to the top topic section of your course and click Add an activity or resource.
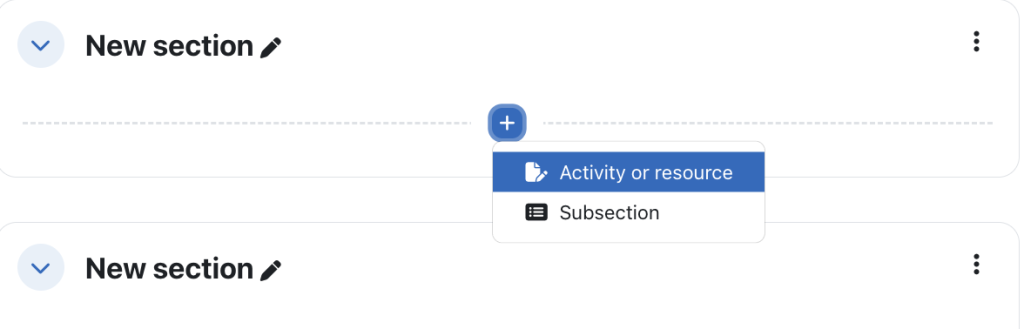
Add an Activity or Reource

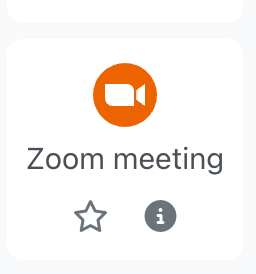
4. In the Moodle Activity Chooser, select Zoom meeting(indicated by the Zoom icon).
5. Configure the general Moodle settings:

  • Activity name: Type a clear, general name for the tool (e.g., Class Name – Section – Online Lectures). This represents the overarching dashboard, not a single meeting. Any future meetings you wish to schedule, whether recurring or a one time meeting can be done via this activity link in the future.
  • Preconfigured tool: Ensure this dropdown is set to Zoom.
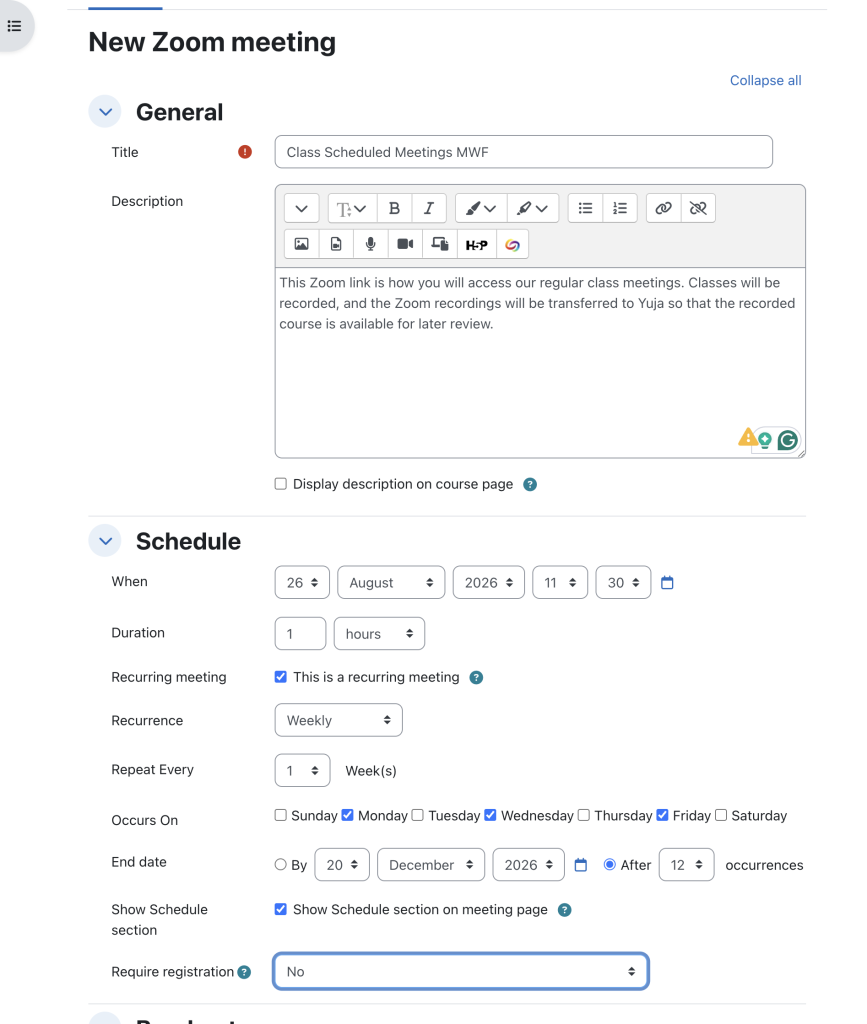
6. Scroll to the bottom of the page and click Save and return to course.

7. On your course page, click on the newly created Zoom Online Lectures activity link to launch the embedded Zoom dashboard.

8. Wait a brief moment for the interface to load, then click the blue Schedule a New Meeting button in the top-right corner.
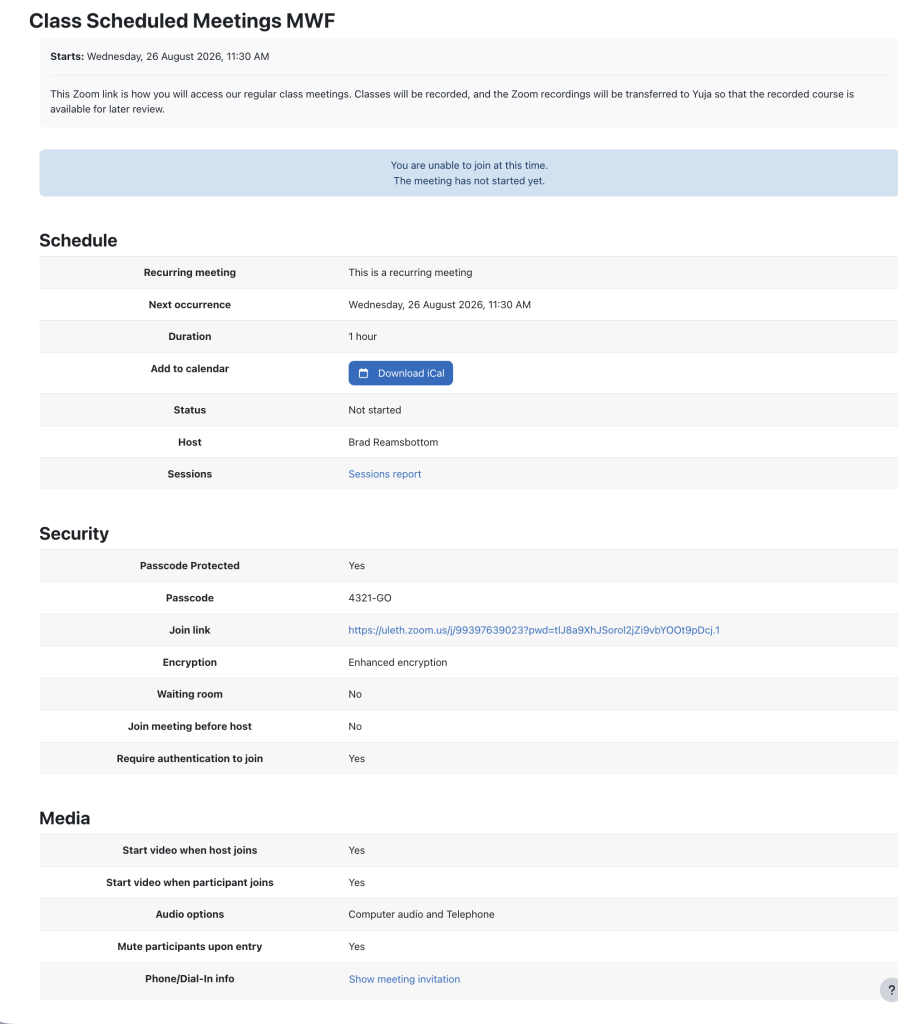
9. Click Save.

Enrolled students will now see this session under their Upcoming Meetings tab when they click the Moodle Zoom link, and it will automatically populate their Moodle Calendar!

How to Enter a Zoom Meeting

If you must attend or host a Zoom meeting but aren’t sure how to get started, this tutorial will walk you through the steps to join or host a Zoom meeting.

To begin: Go to U of L’s Zoom website: https://uleth.zoom.us/

New UofL Zoom Login


(more…)

Scheduling Recurring Class Sessions in Moodle with Zoom

If you teach regular, weekly lectures throughout the semester, you can schedule a recurring Zoom meeting series directly inside your Moodle course. This creates a predictable schedule and avoids the need to build individual activities or links for each week.

If you haven’t added Zoom meeting as an activity or resource yet, do so now. See how to add Zoom meetings tutorial. Once added, continue with the instructions below for Recurring Class Session Step by Step Instructions

Recurring Class Sessions – Step-by-Step Instructions:

1. Open your course page and click on your Zoom Online Lectures activity link.

2. Inside the dashboard, click Schedule a New Meeting (or click on an existing meeting title and select Edit).

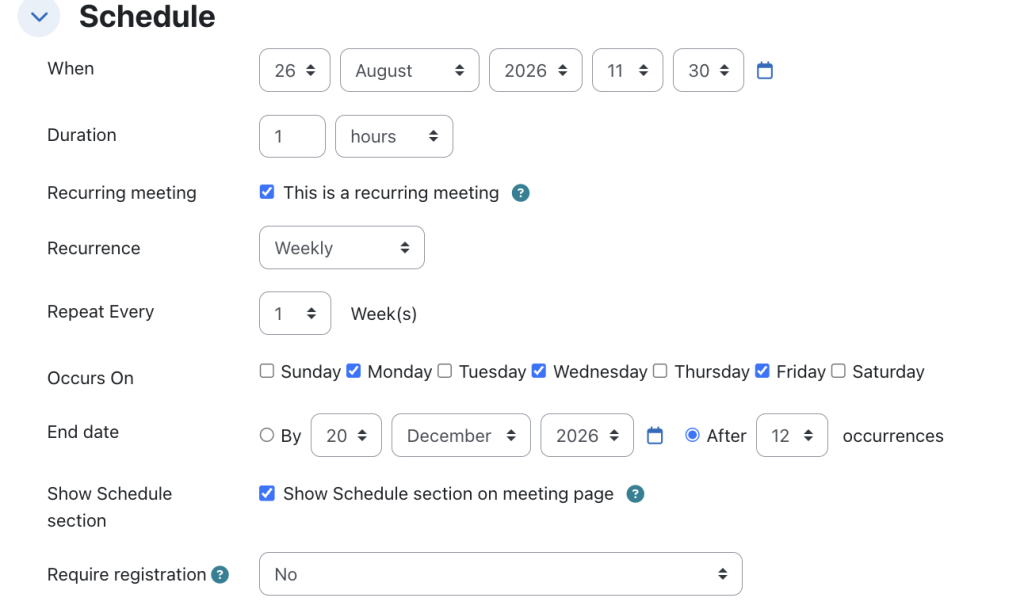
3. Scroll down below the time settings and check the checkbox next to Recurring meeting.

4. Configure the recurrence parameters:

  • Recurrence: From the dropdown menu, select Weekly (this is the most common setting for academic schedules).
  • Repeat every: Set to 1 week.
  • Occurs on: Check the specific days of the week your class meets (e.g., Tuesday and Thursday).
  • End Date: Select the date of your final class session of the semester. Moodle and Zoom will automatically calculate the total number of occurrences based on this date.

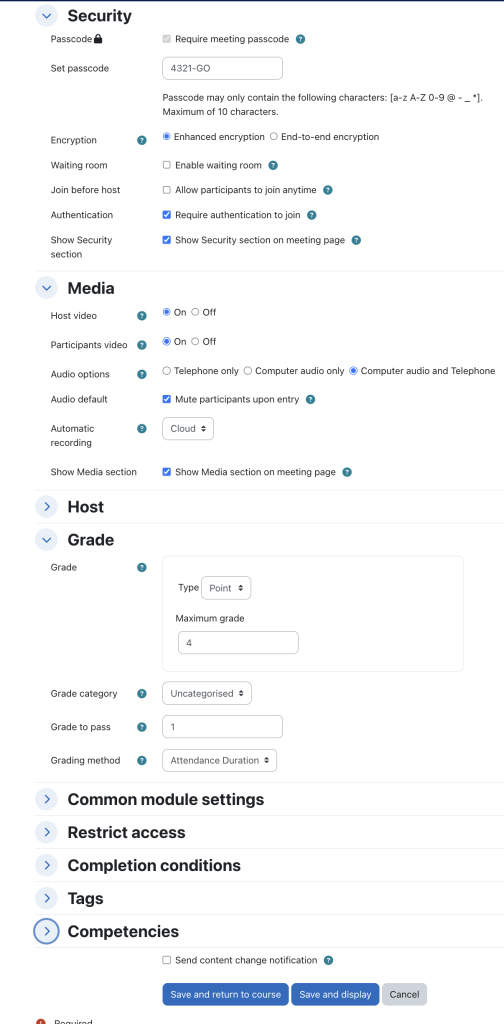
5. Check your security preferences and click Save.

The entire recurring series will now appear under the Upcoming Meetings tab for both you and your students, complete with individual dates and start times.

Automating Zoom Cloud Recording Transfers to YuJa

Instructors do not need to download massive Zoom video files to their computers and manually upload them into Moodle or YuJa. By enabling YuJa’s automated Zoom Integration Connector, any lectures recorded to the Zoom Cloud will automatically import, compress, auto-caption, and store securely in your personal YuJa Media Library. Enabling this rather than manually adding Zoom recordings to your Moodle course keeps the size of your course backup lower and less likely to fail when restoring your course to a different offering in a different semester.

Step-by-Step Instructions

1. Log into your University of Lethbridge YuJa account by going directly to https://uleth.yuja.com and using your UofL credentials.

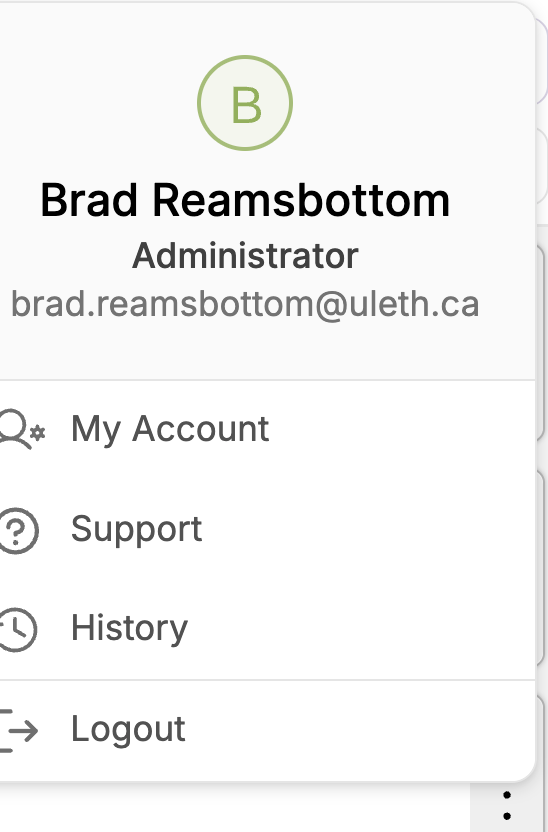
2. Once logged in, click on your Profile icon (Avatar) in the top-right corner of the page and select the My Account option.

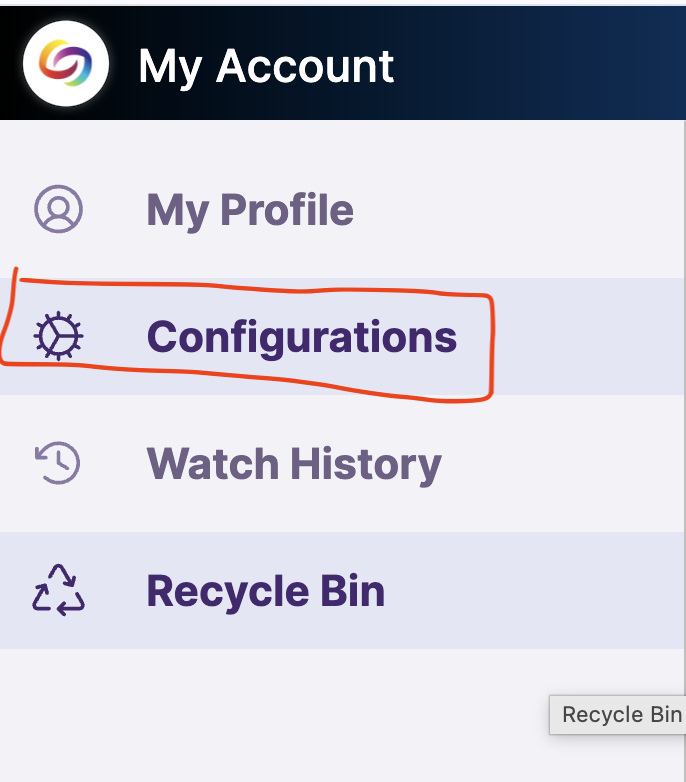
3. Along the left-hand navigation sidebar, click on the Configurations icon

Note: If you do not see the Configurations icon, please contact the Teaching Centre at teachingsupport@uleth.ca so a support staff member can activate this permission on your account.

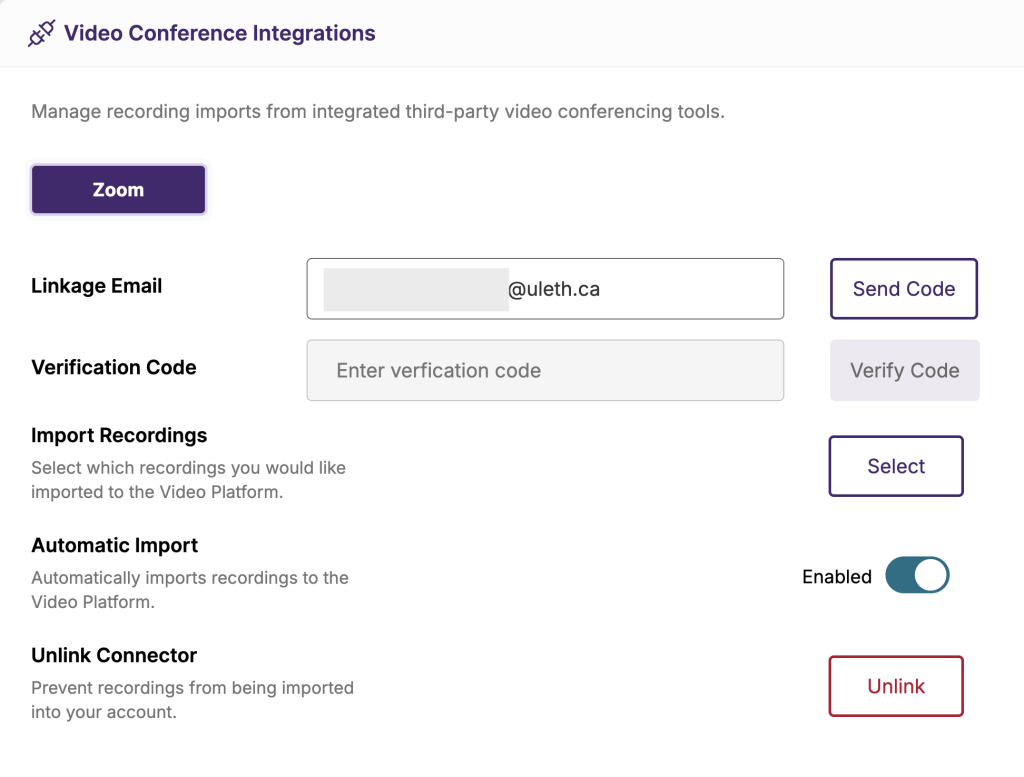
4. On the Integrations screen, locate the Video Conference Configurations section. Confirm that your UofL email address is correctly pre-populated in the Linkage Email field.

5. Click on the Send Verification Code button. This will send an automated, secure verification code directly to your University email address.

6. Open your university inbox, copy the unique Zoom verification code, return to YuJa, and paste it into the Verification Code field.

CRITICAL STEP

7. Before saving, locate the Automatic Import checkbox/toggle and ensure it is enabled. This tells the system to auto-transfer all future cloud recordings.

8. Click the blue Verify and Save button.

Now, all future Zoom recordings will be automatically transferred to your Yuja account and can be reviewed by you and your students when they access your Yuja course videos.

Zoom Learning Center

On-demand courses and live training sessions designed just for educators are now LIVE in the Zoom Learning Center (ZLC)! These materials cover everything educators need to know to set up their classrooms and establish routines for success.You can select from courses and sessions that cover:
  • Getting Started with Zoom for Education
  • Setting Up Your Classroom on Zoom
  • Engaging Your Students on Zoom
  • Zoom In: Breakout Rooms
    And more!

START LEARNING!

Uploading a Zoom Cloud Recording to YuJa

If you have a video saved to the cloud in Zoom, you may want to add that video to YuJa in Moodle. This tutorial will walk you through the steps to manually add the video to your course using the external tool. 

(more…)