Instructors do not need to download massive Zoom video files to their computers and manually upload them into Moodle or YuJa. By enabling YuJa’s automated Zoom Integration Connector, any lectures recorded to the Zoom Cloud will automatically import, compress, auto-caption, and store securely in your personal YuJa Media Library. Enabling this rather than manually adding Zoom recordings to your Moodle course keeps the size of your course backup lower and less likely to fail when restoring your course to a different offering in a different semester.
Step-by-Step Instructions
1. Log into your University of Lethbridge YuJa account by going directly to https://uleth.yuja.com and using your UofL credentials.
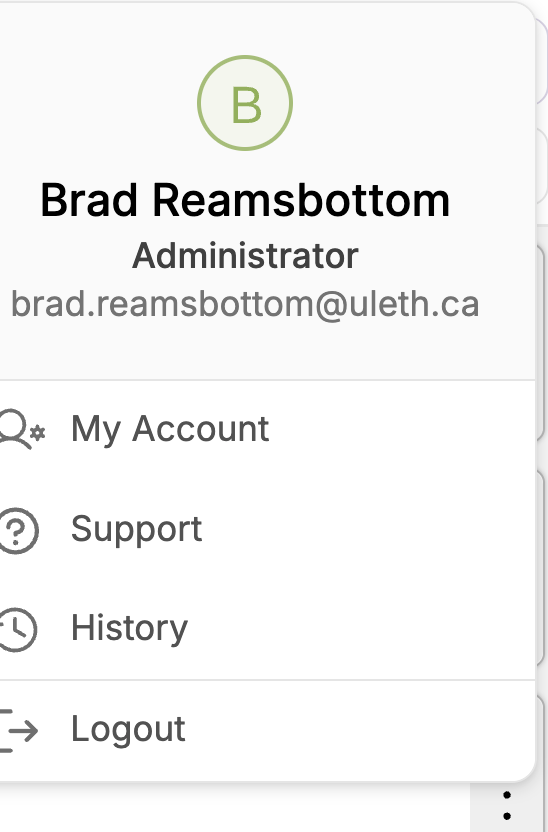
2. Once logged in, click on your Profile icon (Avatar) in the top-right corner of the page and select the My Account option.
3. Along the left-hand navigation sidebar, click on the Configurations icon
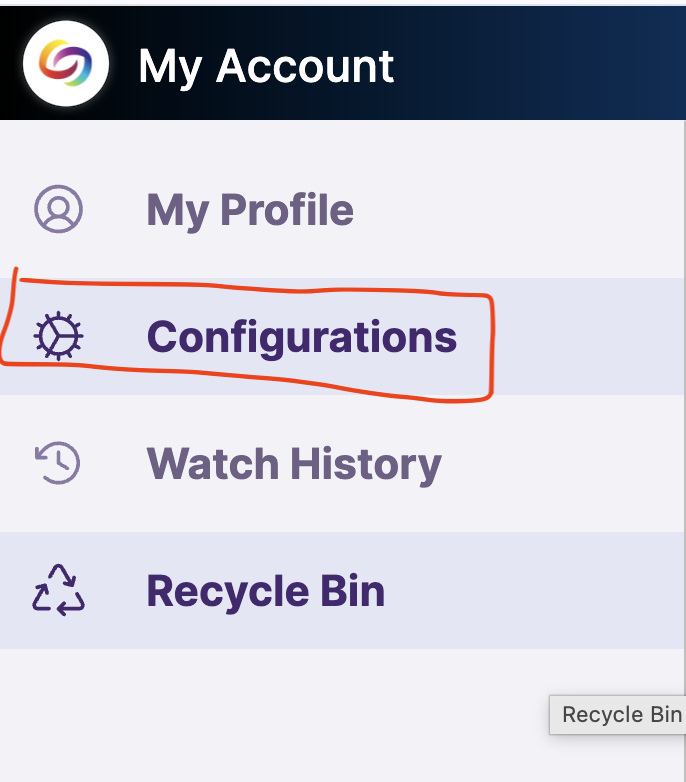
Note: If you do not see the Configurations icon, please contact the Teaching Centre at teachingsupport@uleth.ca so a support staff member can activate this permission on your account.
4. On the Integrations screen, locate the Video Conference Configurations section. Confirm that your UofL email address is correctly pre-populated in the Linkage Email field.
5. Click on the Send Verification Code button. This will send an automated, secure verification code directly to your University email address.
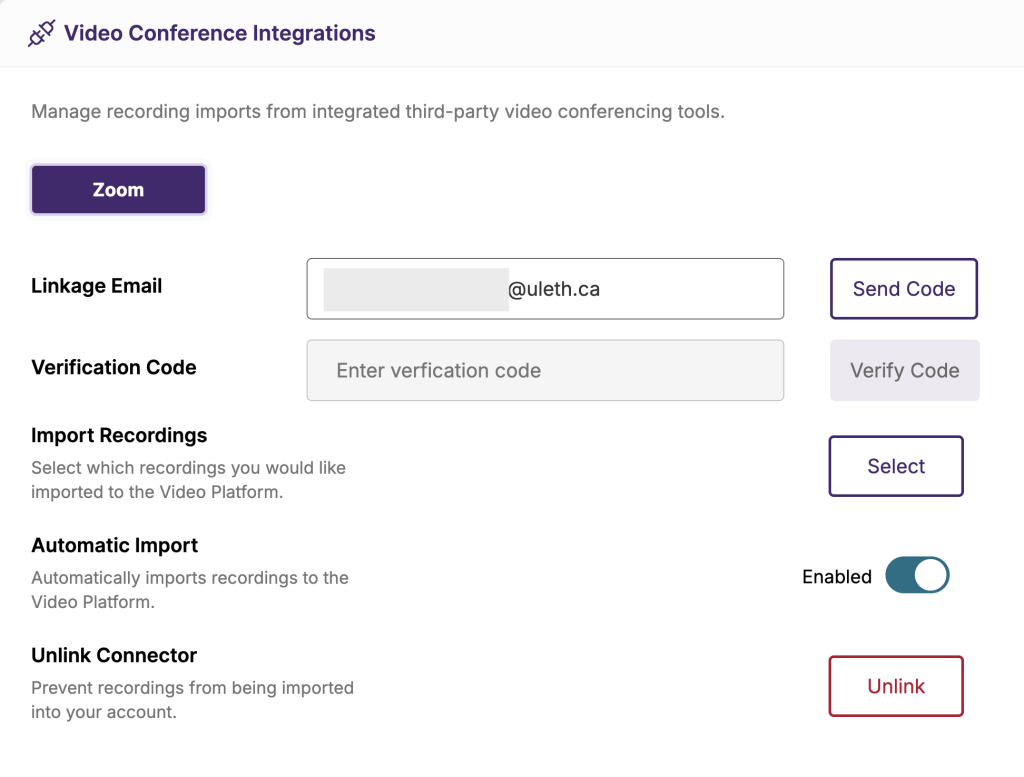
6. Open your university inbox, copy the unique Zoom verification code, return to YuJa, and paste it into the Verification Code field.
CRITICAL STEP
7. Before saving, locate the Automatic Import checkbox/toggle and ensure it is enabled. This tells the system to auto-transfer all future cloud recordings.

8. Click the blue Verify and Save button.
Now, all future Zoom recordings will be automatically transferred to your Yuja account and can be reviewed by you and your students when they access your Yuja course videos.