Support
Recommended H5P Content Types for Higher Education
Below are the most commonly used H5P content types in higher education. However, H5P has a wealth of other content types that you can explore at https://h5p.org/documentation/for-authors/tutorials
Interactive Book
Rapidly becoming the standard for larger modules, this format allows instructors to combine multiple H5P activities (such as videos, quizzes, and text) into a cohesive, multi-page layout featuring a built-in navigation menu and progress tracking.
Official Tutorial: How to Create an Interactive Book
Column
The most popular layout tool for mobile responsiveness. It allows instructors to stack multiple H5P content types (such as chart, followed by an image hotspot, followed by a question set) into a single, scrollable activity.
Official H5P Tutorial: How to Create a Column
Interactive Video
Enhances video-based learning by embedding multiple-choice questions, drag-and-drop interactions, and information overlays directly into the video timeline to check comprehension on the fly.
Official H5P Tutorial: How to Create an Interactive Video
Course Presentation
A highly active alternative to static PDFs or PowerPoint slides. Instructors can build a series of slides that incorporate audio, video, interactive questions, and web links.
Official H5P Tutorial: How to Create a Course Presentation
Question Set (Quiz)
An essential tool for formative assessment and knowledge checks, allowing instructors to build a sequence of various question types (multiple-choice, drag-and-drop, fill-in-the-blank) in one unified activity.
Official H5P Tutorial: How to Create a Question Set
Image Hotspots
Highly utilized in the sciences and humanities for exploring diagrams, maps, and visual processes. Learners click on specific areas of an image to reveal explanatory text, pictures, or video.
Official H5P Tutorial: How to Create Image Hotspots
H5P: Creating New Content via the Content Bank
Moodle’s integration with H5P centers around the Content Bank, a dedicated repository where all interactive content is built and stored. Once created in the Content Bank, these activities can be embedded directly into your course modules.
Step-by-Step Setup
- Navigate to your Moodle course and click on the Content bank link (typically located in the left-hand navigation drawer or the secondary course menu).
- [Image Placeholder: Screenshot of the Moodle course interface highlighting the ‘Content bank’ navigation link.]
- Click the Add button to open the H5P content type selector.
- [Image Placeholder: Screenshot of the Content bank highlighting the ‘Add’ button and the resulting dropdown list of H5P types (e.g., Interactive Book, Column).]
- Select your desired format (such as Interactive Video, Interactive Book, or Column) to launch the H5P authoring tool.
- Build your interactive activity using the specific H5P editor fields, then click Save at the top or bottom of the page. Your activity is now securely saved in the course Content Bank.
- Return to your main course page and toggle Edit mode on.
- Click Add an activity or resource in the desired week or topic and select the H5P activity module (look for the blue H5P icon).
- In the activity settings, click the Package file upload box, select the Content bank repository on the left-hand menu, and choose your newly created activity.
- [Image Placeholder: Screenshot of the Moodle file picker highlighting the ‘Content bank’ repository option on the left side and the selected .h5p file.]
- Scroll down and click Save and return to course to deploy the interactive element for your students.
H5P: Adapting Existing Content in Moodle
If you have found an .h5p file online or received one from a colleague, you can upload and adapt it for your own course using Moodle’s built-in Content bank.
Step-by-Step Setup
- Download and save the .h5p file to your local computer.
- Navigate to your Moodle course and click on the Content bank link (usually located in the left-hand navigation drawer or the secondary course menu).
- Click the Upload button at the top of the Content bank.
- Use the file picker to select the .h5p file from your device, then click Save changes.
- The activity will automatically open in the H5P authoring tool. Make any necessary changes to the content, text, images, or behavioral settings to suit your specific course needs.
- Click Save at the top or bottom of the page. The adapted activity is now stored in your course’s Content bank.
- Return to your main course page, toggle Edit mode on, and click Add an activity or resource to deploy the newly adapted H5P activity using the Content bank repository.
Adding Zoom Meetings in Moodle
Rather than scheduling Zoom meetings in an external portal and copy-pasting links into Moodle, instructors should use Moodle’s integrated Zoom tool. By creating a unified Zoom dashboard, you can schedule and manage sessions directly within Moodle. Scheduled meetings automatically populate the Moodle Calendar and are instantly visible to all enrolled students.
Step-by-Step Instructions
1. Log into Moodle (moodle.uleth.ca) and navigate to your course page.
2. In the top-right corner, click to toggle Edit mode into the active position.
3. Scroll to the top topic section of your course and click Add an activity or resource.
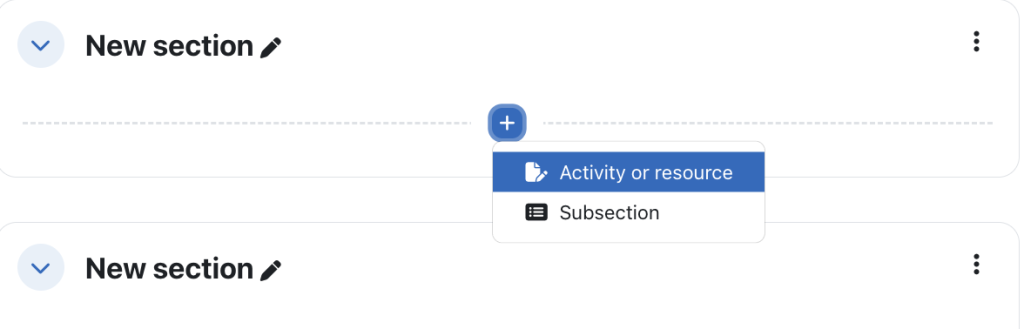
4. In the Moodle Activity Chooser, select Zoom meeting(indicated by the Zoom icon).

5. Configure the general Moodle settings:
- Activity name: Type a clear, general name for the tool (e.g., Class Name – Section – Online Lectures). This represents the overarching dashboard, not a single meeting. Any future meetings you wish to schedule, whether recurring or a one time meeting can be done via this activity link in the future.
- Preconfigured tool: Ensure this dropdown is set to Zoom.
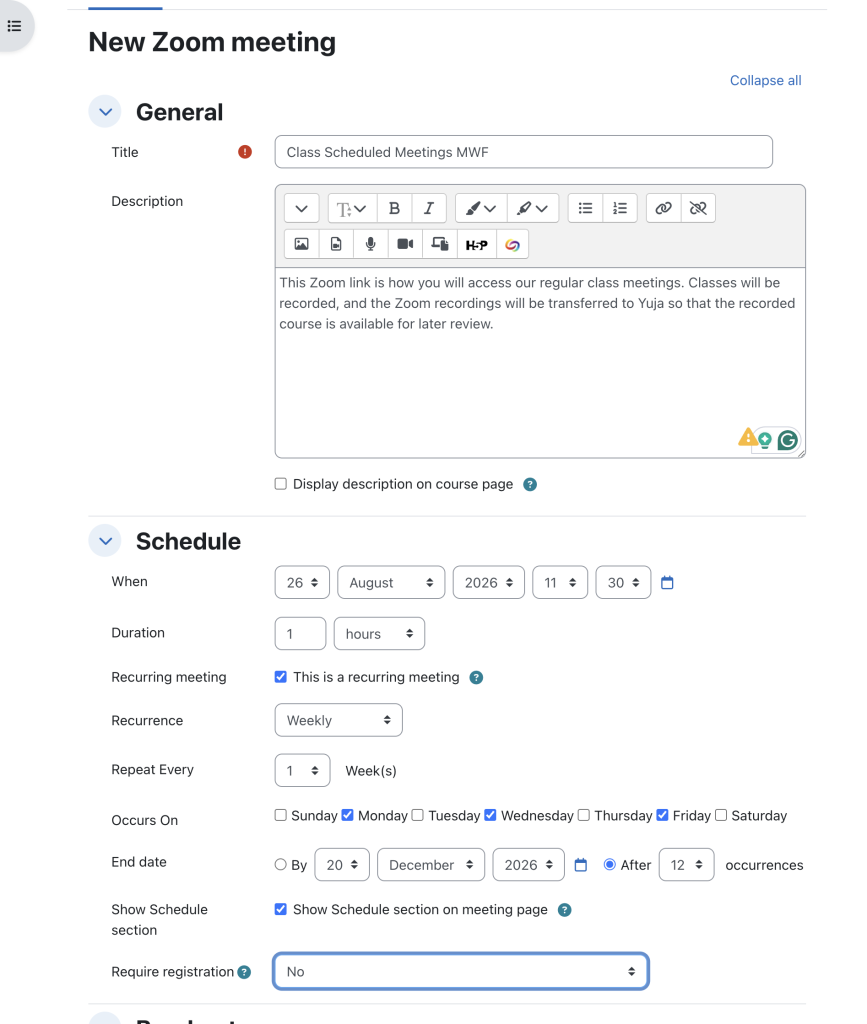
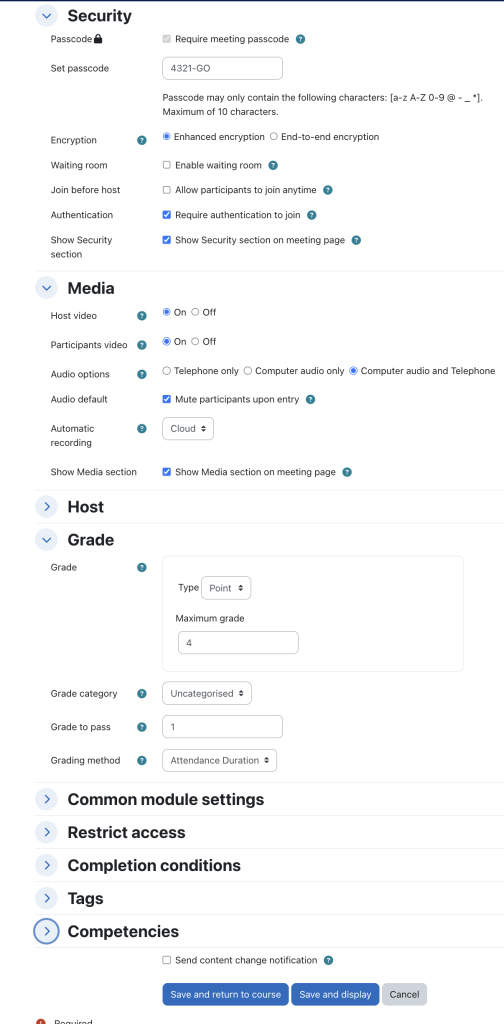
6. Scroll to the bottom of the page and click Save and return to course.
7. On your course page, click on the newly created Zoom Online Lectures activity link to launch the embedded Zoom dashboard.
8. Wait a brief moment for the interface to load, then click the blue Schedule a New Meeting button in the top-right corner.
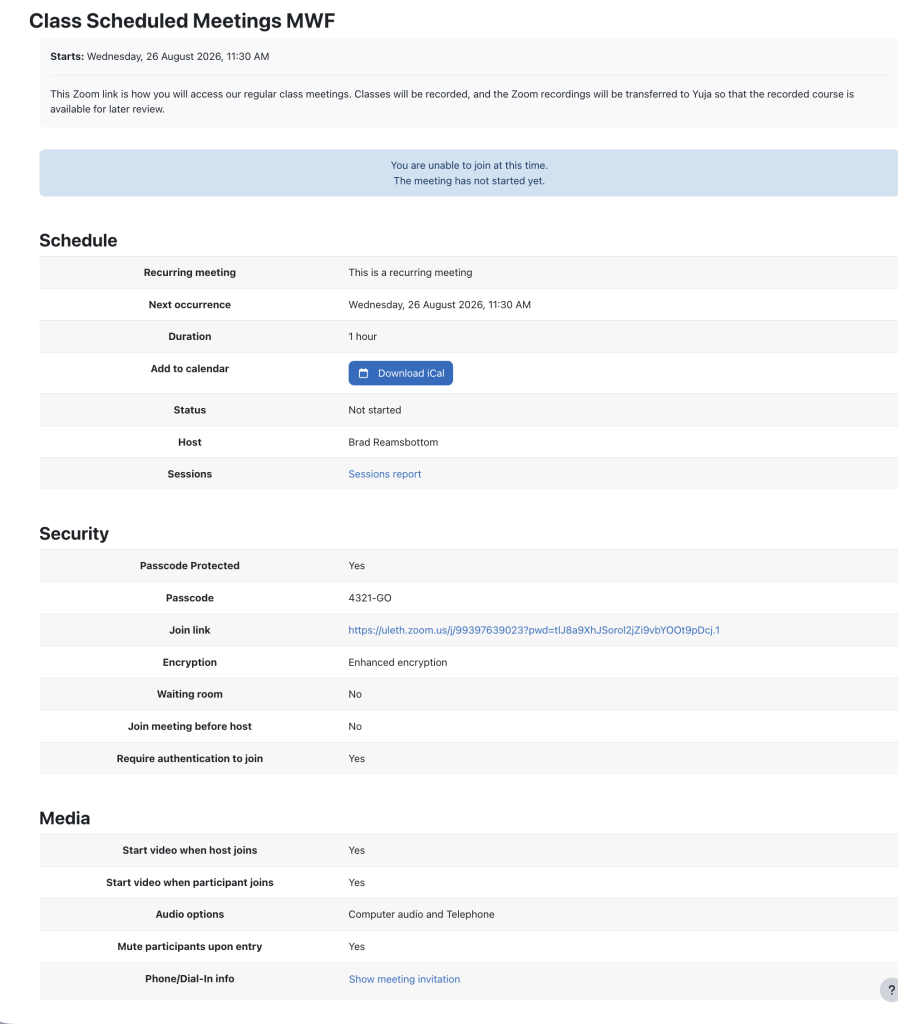
9. Click Save.
Enrolled students will now see this session under their Upcoming Meetings tab when they click the Moodle Zoom link, and it will automatically populate their Moodle Calendar!
Scheduling Recurring Class Sessions in Moodle with Zoom
If you teach regular, weekly lectures throughout the semester, you can schedule a recurring Zoom meeting series directly inside your Moodle course. This creates a predictable schedule and avoids the need to build individual activities or links for each week.
If you haven’t added Zoom meeting as an activity or resource yet, do so now. See how to add Zoom meetings tutorial. Once added, continue with the instructions below for Recurring Class Session Step by Step Instructions
Recurring Class Sessions – Step-by-Step Instructions:
1. Open your course page and click on your Zoom Online Lectures activity link.
2. Inside the dashboard, click Schedule a New Meeting (or click on an existing meeting title and select Edit).
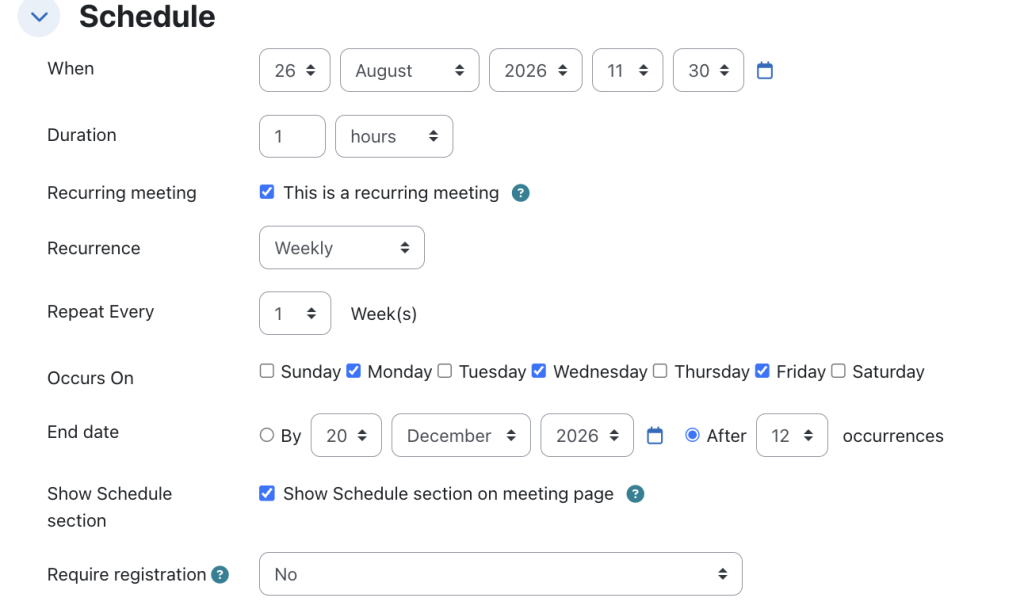
3. Scroll down below the time settings and check the checkbox next to Recurring meeting.
4. Configure the recurrence parameters:
- Recurrence: From the dropdown menu, select Weekly (this is the most common setting for academic schedules).
- Repeat every: Set to 1 week.
- Occurs on: Check the specific days of the week your class meets (e.g., Tuesday and Thursday).
- End Date: Select the date of your final class session of the semester. Moodle and Zoom will automatically calculate the total number of occurrences based on this date.
5. Check your security preferences and click Save.
The entire recurring series will now appear under the Upcoming Meetings tab for both you and your students, complete with individual dates and start times.
Automating Zoom Cloud Recording Transfers to YuJa
Instructors do not need to download massive Zoom video files to their computers and manually upload them into Moodle or YuJa. By enabling YuJa’s automated Zoom Integration Connector, any lectures recorded to the Zoom Cloud will automatically import, compress, auto-caption, and store securely in your personal YuJa Media Library. Enabling this rather than manually adding Zoom recordings to your Moodle course keeps the size of your course backup lower and less likely to fail when restoring your course to a different offering in a different semester.
Step-by-Step Instructions
1. Log into your University of Lethbridge YuJa account by going directly to https://uleth.yuja.com and using your UofL credentials.
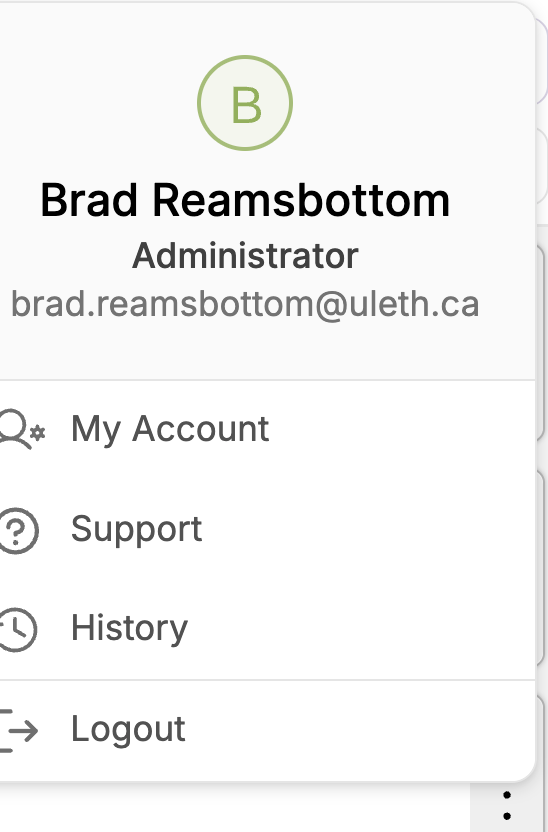
2. Once logged in, click on your Profile icon (Avatar) in the top-right corner of the page and select the My Account option.
3. Along the left-hand navigation sidebar, click on the Configurations icon
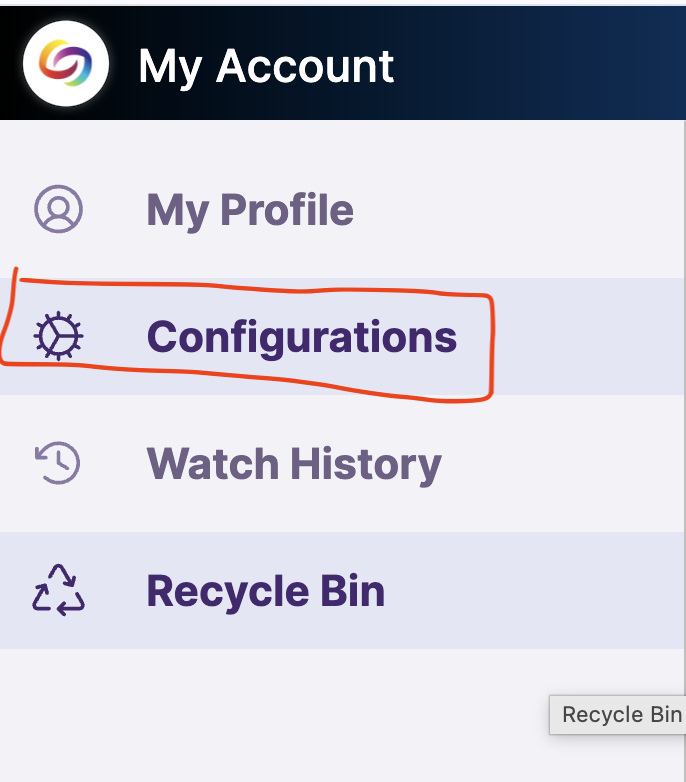
Note: If you do not see the Configurations icon, please contact the Teaching Centre at teachingsupport@uleth.ca so a support staff member can activate this permission on your account.
4. On the Integrations screen, locate the Video Conference Configurations section. Confirm that your UofL email address is correctly pre-populated in the Linkage Email field.
5. Click on the Send Verification Code button. This will send an automated, secure verification code directly to your University email address.
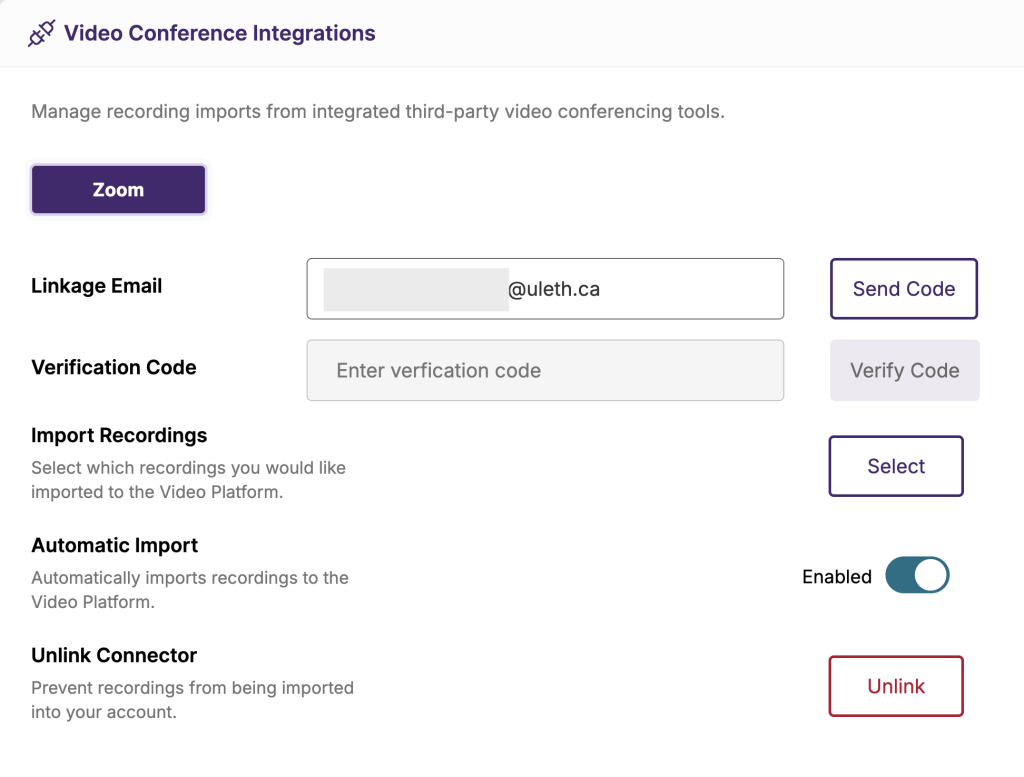
6. Open your university inbox, copy the unique Zoom verification code, return to YuJa, and paste it into the Verification Code field.
CRITICAL STEP
7. Before saving, locate the Automatic Import checkbox/toggle and ensure it is enabled. This tells the system to auto-transfer all future cloud recordings.

8. Click the blue Verify and Save button.
Now, all future Zoom recordings will be automatically transferred to your Yuja account and can be reviewed by you and your students when they access your Yuja course videos.
Creating a Standard TurnItIn Assignment
Setting up a standard assignment relies on the Select Content deep-linking workflow, which bridges Moodle directly with Turnitin Feedback Studio.
Step-by-Step Setup:
1. Enable Editing
Go to your Moodle course homepage and toggle Edit mode on (located in the top right corner).

Locate the specific topic, section, or week where you want the Turnitin assignment to appear and click Add an activity or resource.
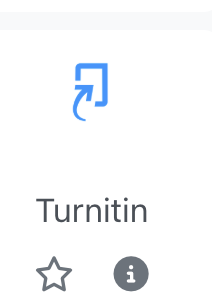
2. Choose Turnitin
In the activity chooser, choose the Turnitin activity.
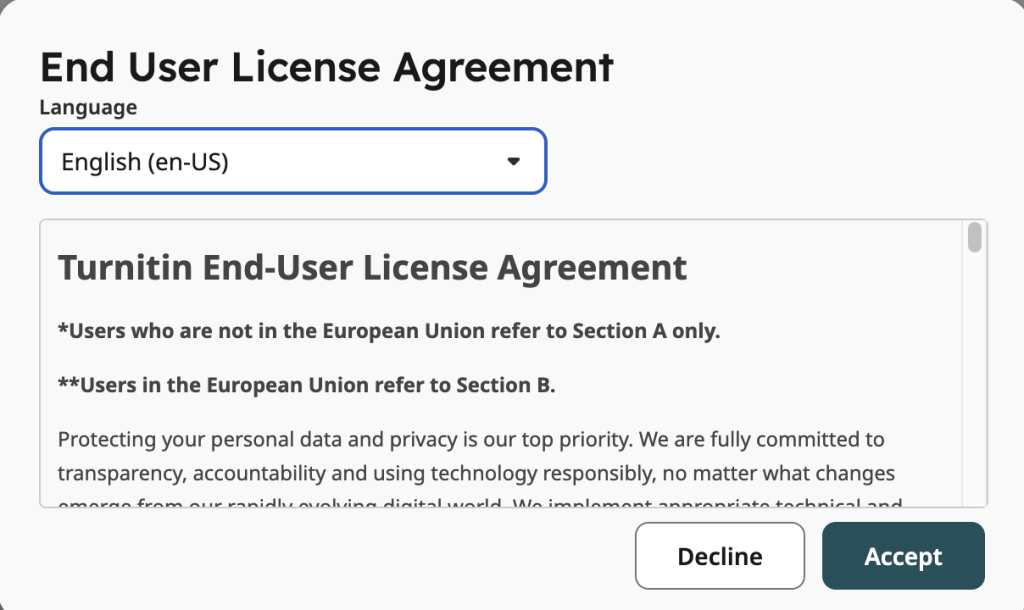
3. Select Content
In the settings menu that appears, click the Select content button. This opens the Turnitin setup window via deep linking. (Note: If this is your first time using the integration, you may be prompted to accept an End User License Agreement).
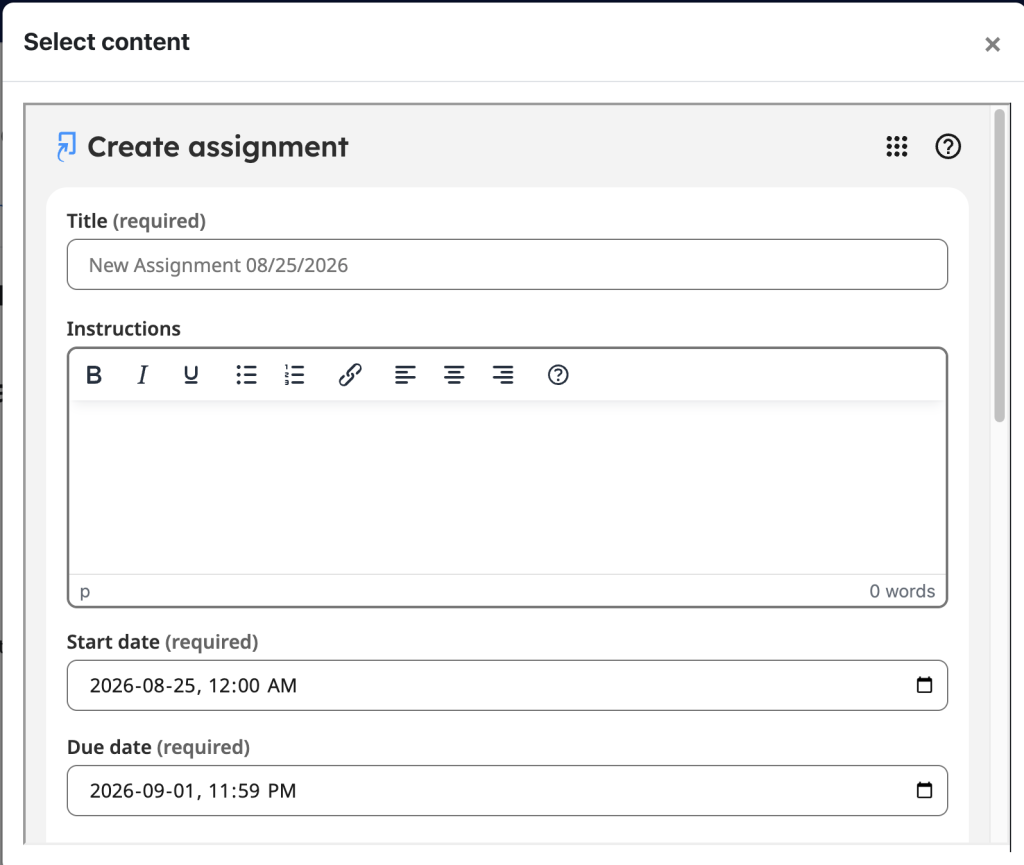
4. Configure Assignment Details
Configure your core assignment details within the Turnitin window or the External Tool tab
- Enter the Assignment Title and Instructions.
- Set your Start Date, Due Date, and Feedback Release Date.
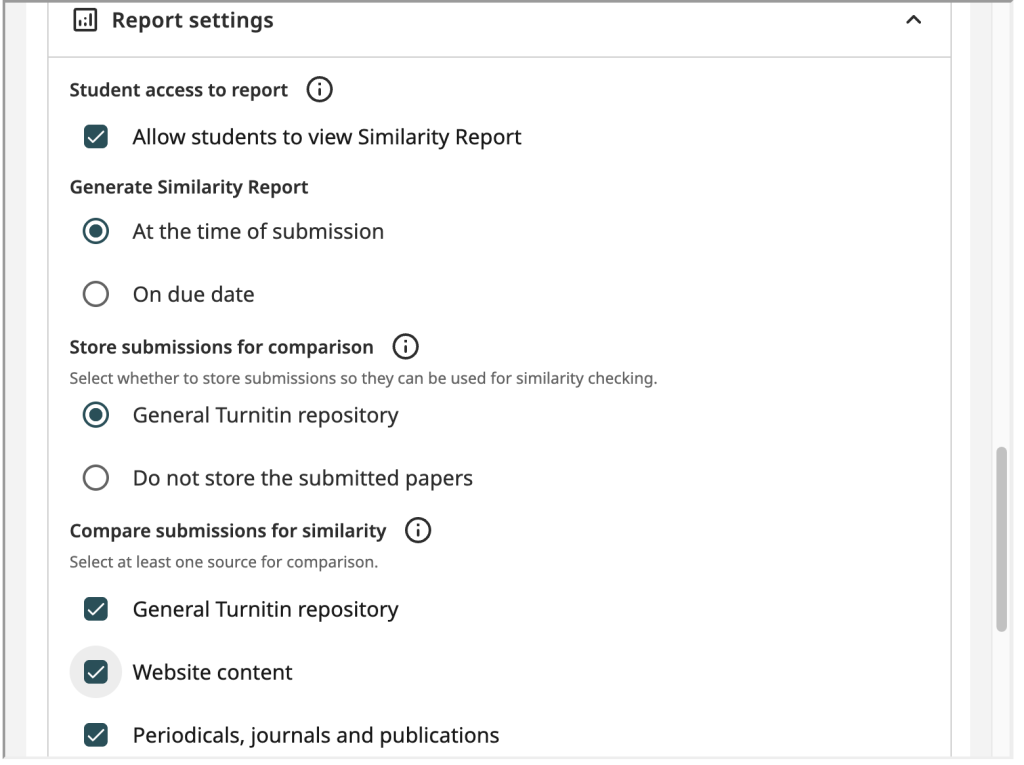
5. Similarity Reports and Repositories
In the Report settings area, define your similarity report and repository choices.
- Decide if you will allow students to view the Similarity Report after the due date or at the time of submission.
- Choose Standard Paper Repository for final papers. Or choose Do not store submitted papers if students are submitting drafts.
- Click Submit at the bottom of the Turnitin window to save these configurations.
- The Turnitin window will close, and the Tool URL and Activity Name fields will automatically populate back into Moodle.
- Scroll to the bottom of the Moodle settings page and click Save and return to course to complete the deployment.
#turnitin #TO-DO #TUTORIAL #WORK
Designing Multipart Assignments in Turnitin
Instructors are advised to structure multipart assignments by creating separate, sequentially organized Moodle activities for each phase of the project (e.g., Part 1: Draft Outline, Part 2: Peer Review/Feedback, Part 3: Final Draft).
Why Use Separate Moodle Activities?
- Gradebook Clarity: Each part receives its own dedicated column in the Moodle Gradebook automatically, preventing scoring overlap or confusion.
- Individual Settings: You can apply custom settings for each submission phase. For instance, you can disable paper repository storage on Part 1 (Draft) so that the student’s final paper on Part 2 does not generate a 100% similarity match against their own draft.
- Clear Student Deadlines: Students see independent start dates, due dates, and feedback release dates on their course page and Moodle calendar for each milestone.
Example Workflow Setup:
- Create Part 1 (Draft / Outline Submission):
- Set up a Turnitin assignment following the steps in Creating a Standard Turnitin Assignment
- Under Optional Settings, set Submit papers to as Do not store submitted papers. This ensures the draft is checked for similarity but not saved to the institutional database.
- Create Part 2 (Final Submission):
- Repeat the setup process to create a second, distinct Turnitin activity.
- Under Optional Settings, set Submit papers to the Standard paper repository. This will store the final work in the database and cross-reference it against external databases and future student submissions.
- Organize on Moodle Homepage: Use Moodle’s drag-and-drop handles to position the assignments sequentially within the same module or section.
- Rename them clearly (e.g., “Research Project – Part 1: Initial Draft” and “Research Project – Part 2: Final Report”).
TurnItIn Workflows for Instructors
Grading, Feedback & Rubrics
- Using, Importing, and Exporting Rubrics
Learn how to attach a rubric or grading form to your assignments for consistent grading. This guide also covers how to export.rbcfiles and import formatted Excel spreadsheets to share rubrics across courses or with teaching colleagues. - Enabling Anonymous Marking
Ensure objective, unbiased grading by hiding student names in your Turnitin assignment inbox and Feedback Studio interface. Names will automatically be revealed once the Feedback Release Date passes. - Submitting on a Student’s Behalf
If a student is experiencing submission issues or has emailed you their file directly, follow this guide to upload files (from your local computer, Google Drive, or OneDrive) directly into their slot within your Moodle Turnitin Assignment Inbox.
Assignment Administration & Downloads
- Bulk Downloading Submitted Assignments
(Navigate to the “Download options” section of this guide)
Steps for bulk downloading student submissions in a single compressed.zipfolder. You can export original student submissions, standard PDFs that preserve inline feedback/grades, or a grade report summary spreadsheet. - Using PeerMark with Turnitin Assignments
PeerMark is Turnitin’s robust peer-review tool. This section outlines how to create a PeerMark assignment, edit peer-review questions, allocate papers, and review classmate evaluations.
Similarity & Grade Integration
- Understanding the Similarity Score
A complete breakdown of similarity percentage ranges, index interpretations, and instructions on how to use academic judgment when distinguishing between expected citations and potential misconduct. - Acceptable File Types for Submission
Detailed specifications regarding supported file sizes (under 100MB), word count minimums (20+ words), page limits (under 800 pages), and allowed file extensions (such as.docx,.pdf,.pptx). - Troubleshooting Grade Sync Issues
If grades entered inside Turnitin Feedback Studio are not propagating to the Moodle Gradebook, consult this FAQ. The most common resolution is verifying that the “Maximum grade” in Moodle’s activity settings is set to a value greater than 0.